
The General settings in Webmail allow you to customize the service according to your preferences. In addition to changing the language, time zone, and default text style, you can configure when opened messages are marked as read, how the Enter key behaves while composing emails, whether additional accounts open in the same browser tab, and several other settings that affect your daily use of Webmail.
General webmail settings can be found by clicking on the gear icon on the top right and View all settings, then click General.
Set Webmail as the default email handler
If you want email links (mailto:) to open directly in Zone Webmail, you can set Webmail as your browser’s default email handler.
Go to Settings, General and click Activate next to Set Webmail as default email handler.

After clicking Activate, your browser will ask for confirmation. Once accepted, clicking an email address on a website will open a new message in Zone Webmail.
Changing the default formatting
In Webmail, you can change the default style of the emails you create.
For example, if you don’t want your emails to be typed in Roboto, which is the default font in Webmail, you can change it to a different font.
You can change the formatting of the email in the general settings under Default Text Style.

To change the font, click Roboto (system font).
To change the font size, press 12pt, and to change the font colour, press A.
The crossed-out T button can be used to cancel all changes, i.e. to return to the default format.
There are 22 different colours listed under letter colour change, but you can also specify more specific colour preferences. To do this, first open the colour selection and click on the colour palette icon in the bottom right corner. A window then opens where you can select a more specific colour or enter the desired RGB or HEX code.
You can also adjust the line spacing using the Line spacing button in the editor toolbar.
Two- and three-panel view
By default, the mailbox is displayed with three panels. This means that webmail is divided into three parts – on the left is a list of folders in the mailbox and saved contacts, in the middle is a list of emails, and on the right is the content of a valid email.
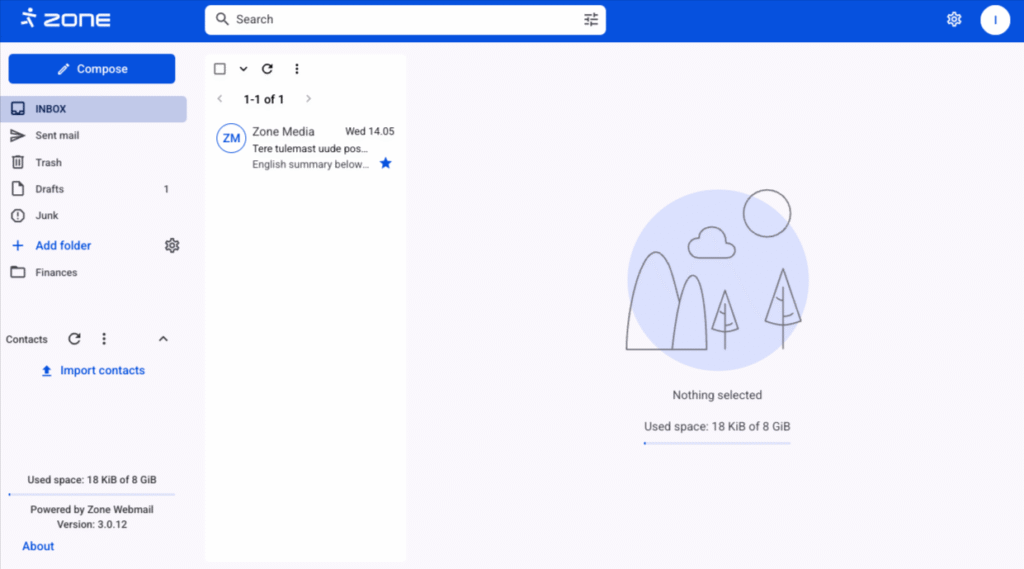
It is also possible to use the two-panel view, which displays a list of emails and opens the email across the screen.
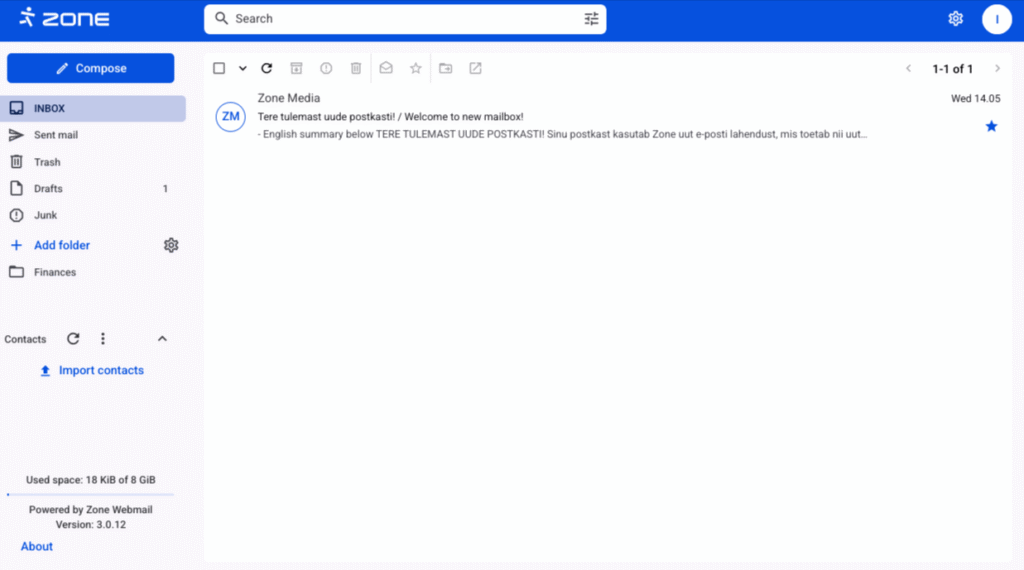
You can change the screen view by clicking on the gear icon on the top right, and in the Reading pane you can choose between three (On the right) and two (Hidden) panes.
Conversation/thread view
The Conversation/thread view option determines whether emails with the same subject are grouped together.
- When enabled, related emails are displayed as a single conversation (thread).
- When disabled, each email is displayed separately in the message list.

Conversation view makes it easier to follow longer email exchanges.
Cancelling the sending of an email
In General under the Undo Send section you can configure the cancellation of sending an email.
By default, the option to cancel sending is available for 5 seconds, but you can set it for a longer period or disable it.
In the drop-down menu that appears, you can set five different time periods for cancelling a send – 5, 10, 15, 20 or 30 seconds. This means that if you have already clicked Send, you can cancel the email during this time and it will not be sent. The email will be saved in the Drafts folder. If you have selected Turn Off, the email will be sent immediately after you click Send and you will not be able to stop sending it.

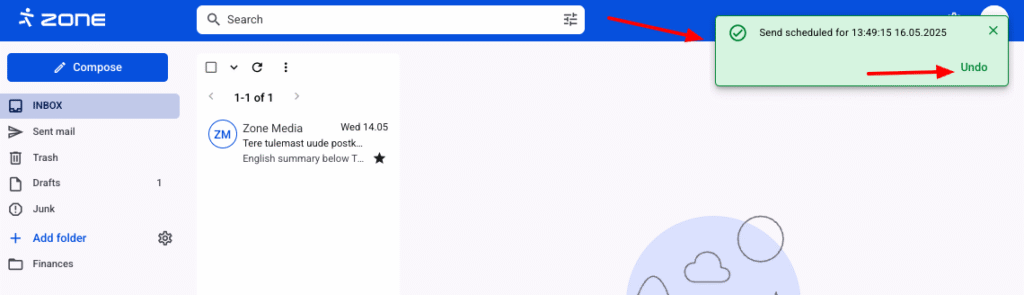
When you send an email, you will see the message Sent scheduled for and date as well as time. Next to it the message Undo. Depending on the selected time, the sending can be cancelled. The cancelled e-mail is moved to the Drafts folder.
Mark opened message as read
Under Settings, General, the Mark opened message as read setting lets you choose when an opened email is marked as read.
You can choose one of the following options:
• Immediately
• After 1 second
• After 5 seconds
• After 15 seconds
• Never

If you choose a delay, you can move to another email before the selected time has elapsed and the previous email will remain unread.
Selecting Never disables automatic marking of opened messages as read.
Open next message after moving
The Open next message after moving option determines what happens after moving or deleting messages.

When enabled, Webmail automatically opens the next message in the reading pane after a move or delete action.
When disabled, you remain in the message list after the action has been completed.
Open another account in the same tab
If you use multiple email accounts in Webmail, you can choose how another account is opened when switching between accounts.

By default, another account is opened in the same browser tab.
- When
Open another account in the same tabis enabled, switching accounts replaces the currently open mailbox. - When the option is disabled, the selected account opens in a new browser tab. This allows you to keep multiple mailboxes open at the same time and switch between them using browser tabs.
When mailboxes are opened in separate tabs, each browser tab also displays the number of unread messages for that account.
If you regularly use multiple email accounts, we recommend using the same setting for all of them.
Show message size in the list
Enable Show message size in the list to display the size of each email in the message list.

When the option is disabled, the message list is displayed without showing message sizes.
Enter key behavior in the editor
The Enter key behavior in the editor setting allows you to choose how the Enter key behaves while composing an email.

The available options are:
| Option | Description |
|---|---|
| Default (paragraph) | Pressing Enter creates a new paragraph. Pressing Shift + Enter inserts a line break. |
| Paragraphs only | Both Enter and Shift + Enter create a new paragraph. |
| Line breaks only | Both Enter and Shift + Enter insert a line break. |
| Invert default behavior | Pressing Enter inserts a line break, while Shift + Enter creates a new paragraph. |
Toolbar location
Use the Toolbar location setting to choose whether the formatting toolbar is displayed above or below the email editor.

Contacts list shown in mailbox sidebar
Under Appearance, Contacts list in the mailbox sidebar, you can choose whether the contacts and groups list is displayed in the left sidebar of the mailbox.

When this setting is disabled, the contacts list is hidden, leaving more space for messages.
Forwarding
In addition to the “My Zone” control panel, each user of a mailbox can forward a copy of mails arriving at their own address to another address. This means that in addition to the address of this mailbox, a copy of the mail will be forwarded to another specified address.
The added address(es) is saved automatically.

Email as an .EML file
Sometimes Zone support asks you to send the problematic email you received (or sent) as an .eml file. This file is needed to check the email headers.
To download an email in .eml format, log in to webmail at https://webmail.ee. Then open the desired e-mail and choose Show original from the three-dot menu in the upper right corner.
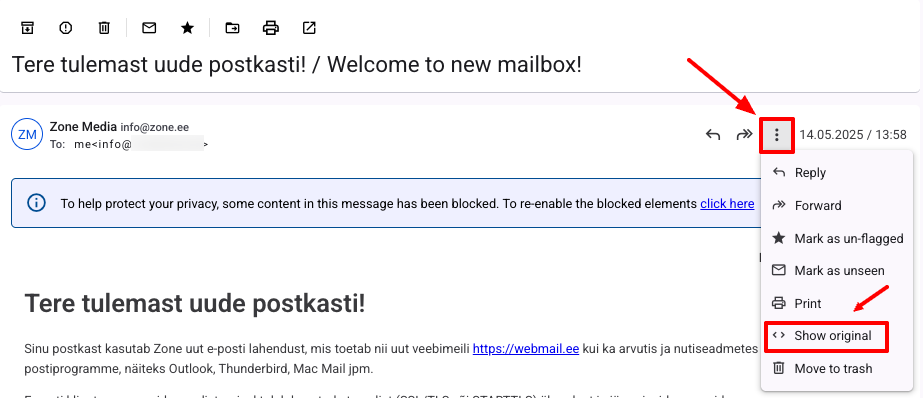
On the new page, click on Download at the top left of the page.
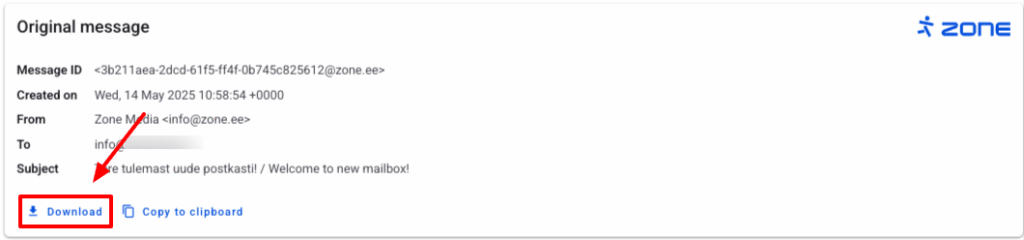
The email is saved to your local computer, the file name is message.eml. Please send this file to us as an attachment.